måndag 21 april 2014

A frame for a Duchess - with a tutorial

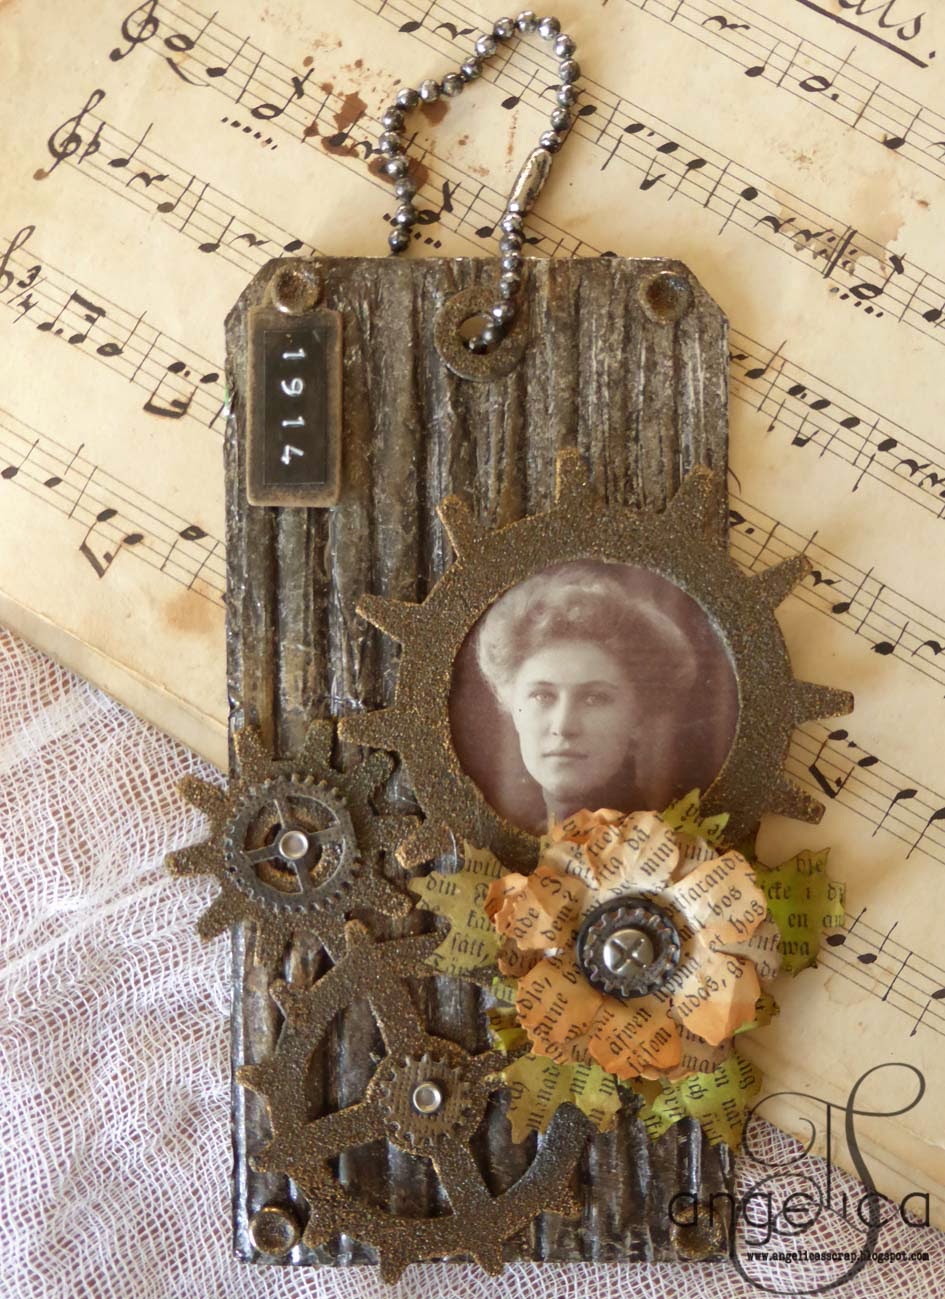
I found a small portrait in a rather plain frame at the local fleamarket. The portrait was
printed on a satin fabric. On the back it said that the lady in the picture was a Beatrice d'Este. 
Beatrice was the duchess of Milan born in 1475. She became famous for her patronage 
of artists during the Italian Renaissance. I thought the frame was to plain and modest for a 
duchess so I decided to make her a new one....


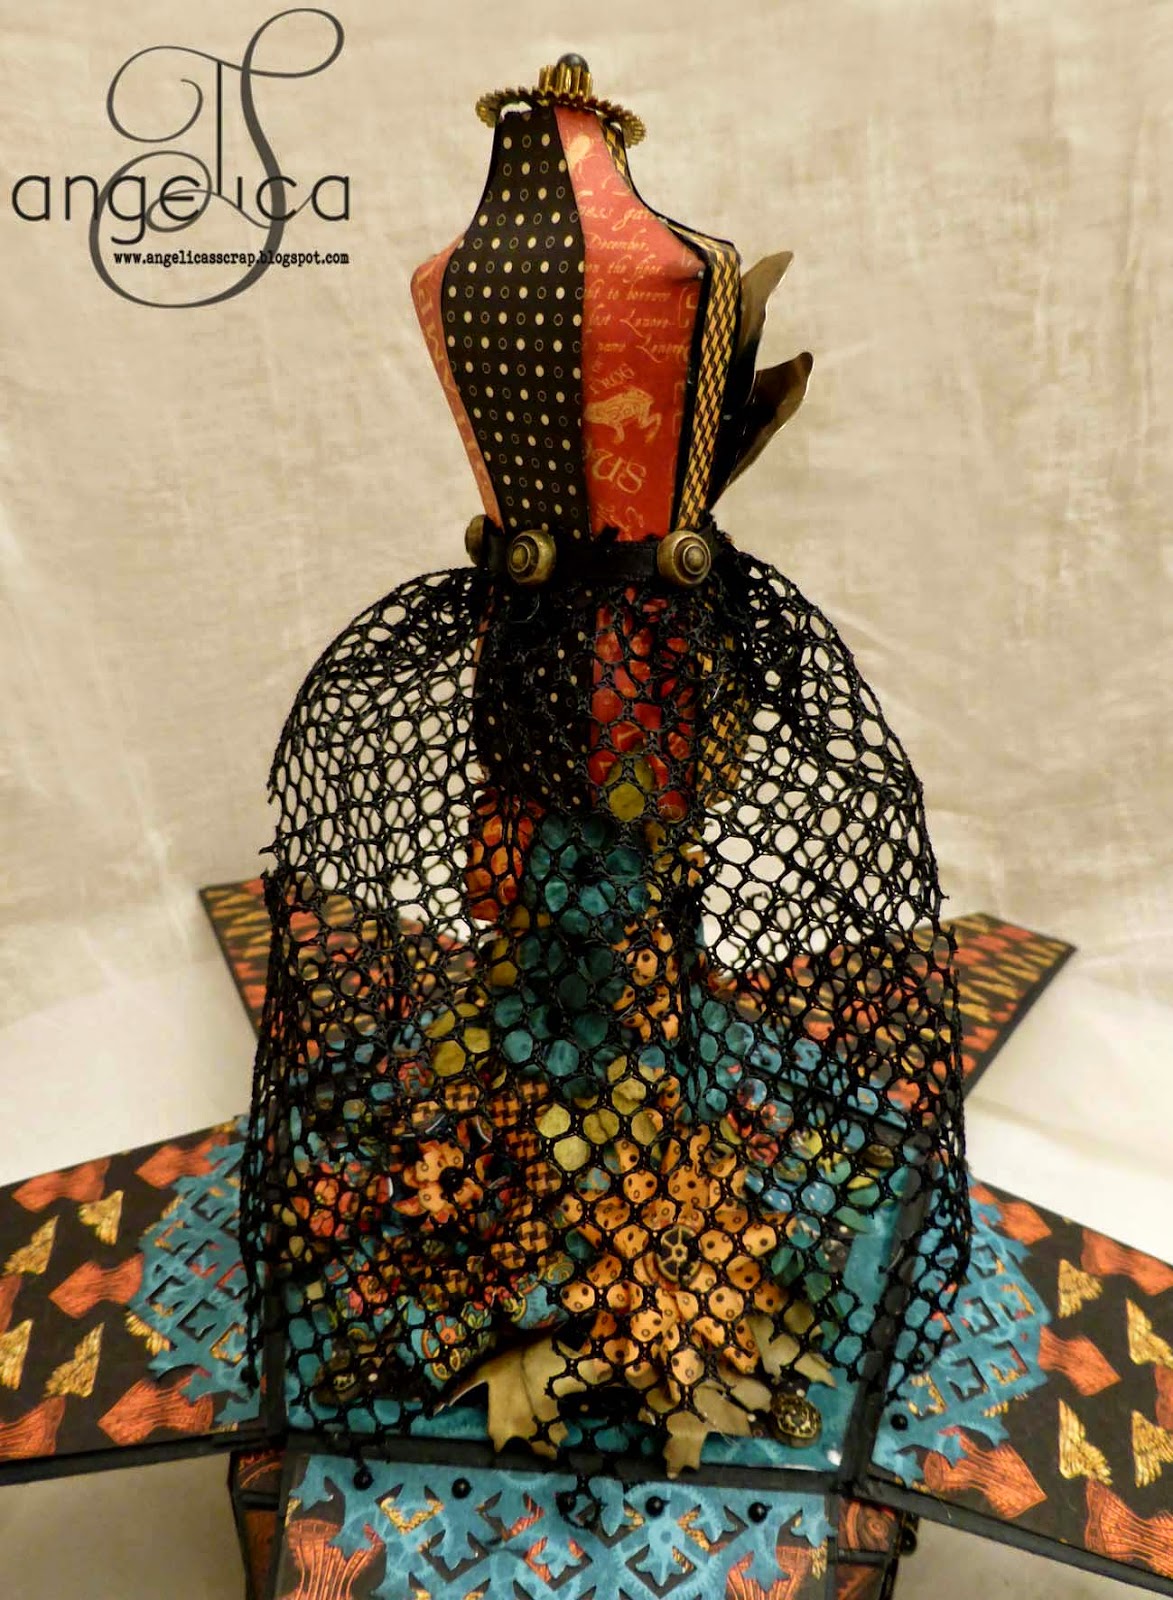
I mounted the small frame inside a bigger one 22x28 cm.


A lot of embellishments..


...and a lot of DecoArt acrylic paint


I doubt that she ever saw a zipper or a wrist watch in her lifetime...


Cogs and gears for a "steampunk" touch...


Crowned with a star...


A small boot to honor her Italian heritage..


A lot of texture on the background...


"Step by Step"


I used Decoart Traditions Carbon Black, Aquamarine, Blue Green Light,
English Red Oxide and Warm White. 
Americana Gloss Enamel Rich Espresso and Texture Fierro Iron Black.
Two picture frames, lace and ribbons and lots and lots of small trinkets, decorations 
and junk (I prefer to call it treasures LOL)


First of all I needed texture, I found a really cool ribbon in my stash....
and glued it to a peice of chipboard. 


I glued the smaller frame to the chipboard....


I glued another ribbon to the larger frame and attached the chipboard inside


At this point it's a really good idea to give the frame a first coat of paint...


The outside rim of the frame was to smooth for my liking so I dabbed on some
Texture Fierro Iron Black.....


Then I started to glue down my decorations....buttons, upholstery nails, paper 
flowers metal charms, glass beads...


....zippers, plaster decorations, parts from a wrist watch, plastic cogs from a printer,
hair pins, small light bulbs, pieces from old earrings......


Now I got all my "junk" glued down, I do love my hot glue gun for this type of
projects. 


One more coat of Traditions Carbon Black and then we are ready for some
serious dry brushing!


First some dry brushing with Traditions English Red Oxide.........


Then I added some Blue Green Light and Aquamarine for some extra patina.
A tiny bit of Warm White for highlights.


Finally I dry brushed the whole thing with Americana Gloss Enamel 
Rich Espresso. It's not as opaque as the Decoart Traditions line so it allows
the layers of green and red to show thru and gives a brilliant, antique finish.


fredag 18 april 2014

Happy easter!!

Every year I make an easter egg for my mother, this year is no exception.
I made a lace covered, green/black metallic egg, with a LOT of Decoart acrylic paint.

Varje år gör jag ett påskägg åt min mor, i år är inget undantag. Årets upplaga
blev en skapelse i grön/svart metallic med massor av skrot och Decoart akrylfärger.


A lot of stuff glued to the egg....flowers in metal, paper and yarn.

Massor med diverse "skrot" fastlimmat på ägget....blommor av metall, papper
och garn.


 The whole egg covered with a lace ribbon to create a cool texture.

Jag började med att täcka ägget med bitar av ett spetsband för att skapa
en cool struktur.


I painted the egg in black and then dry brushed it with 
Decoart Americana acrylics in blue, green, red and gold metallic.

Grundmålade med svart akrylfärg och torrborstade sedan med Decoart
Americana akrylfärger i blått, grönt, rött och guldmetallic.


Metal charms, pieces from old  watches.........

Metall dekorationer och delar från gamla klockor....


I even managed to sneak in a small skull LOL

Jag lyckades till och med smyga in en dödskalle


A metal chain around the edge.

En metall kedja runt kanten på locket


I do love my hot glue gun for this kind of projects.....

Jag älskar min limpistol när jag pysslar med sådana här projekt.


I didn't like the yellow/pink easter bunnies on the inside, ok ok they were kind of 
cute, but not a very good match to the outside of the egg. So the inside got the 
same treatment as the outside.

Jag gillade inte dom gula och rosa påskhararna på insidan av ägget, visserligen söta men
passade inte direkt ihop med utsidan, så insidan fick också en omgång med akrylfärger.


Black, green, blue and gold acrylics.... 
Not a very cute, springlike easter egg...but I guess my mother would be really
 worried if I made an yellow/pink cute egg with easter bunnies...and we don't want 
to upset our mothers, do we?!

I wish you all a HAPPY EASTER!!

Svart, grönt, blått och guldmetallic....
Inte direkt ett gulligt vår-likt påskägg...men jag tror nog att Mamma skulle bli riktigt 
orolig om jag gjorde ett gul/rosa ägg med påskharar och vi vill väl inte göra Mamma
upprörd?!

GLAD PÅSK!!!


tisdag 15 april 2014

1914-Workshop

I spent last weekend in the company of a group of very creative ladys. 23 ladys gathered 
for a whole weekend of scrapbooking, crafting, talking and laughing, from friday night to 
sunday afternoon. On saturday morning it was time for a workshop....with me as the teacher.
Here is what my students created (this is my sample) a tag.

Jag tillbringade helgen i sällskap av ett tjugotal glada tjejer. Ett helt gäng hade samlats 
i Bollnäs för att pyssla hela helgen från fredag kväll till söndag eftermiddag. På lördagen 
var det dax för kurs....med mej som kursledare. 
Deltagarna fick göra en tag, (det här är är mitt prov exemplar)


A tag made from packaging covered in aluminiumtape. Black Gesso and metallic rub-ons 
to create the illusion of a tarnished metal piece.1914 referes to the year the photo was taken.

En tag av emballagekartong, täckt med aluminium tape som bakgrund. Svart Gesso och 
Metallic Rub-ons i olika nyanser skapar en illusion av gammal sliten metall. 1914 är året 
då bilden togs. 


We played with structure paste to create structure before we applied the aluminium tape.
 Black Gesso on the ball chain.

En hel massa "klet" under tapen skapar läcker struktur. Svart Gesso på kulkedjan


The flower and leaves made of old book pages colored with Distress Ink and mist mixed from water and Primary Elements from Luminarte.

Blommor och blad av gamla boksidor infärgade med Distress Ink och Mist blandad 
av vatten och Primary Elements från Luminarte.


Distress Embossing powder on the decorations to create a rust effect. The cogs cut with dies 
from Sizzix/Holtz and Rox Stamps. A huge THANK YOU to my very talented students!!
They all created great looking pieces of old tarnished metal!!!

Distress embossingpulver på dekorationerna för att skapa en rostig effekt. Kugghjulen 
utstansade ur chipboard med dies från Sizzix/Holtz och Rox Stamps. Ett stort TACK 
till mina läraktiga elever! Alla visade prov på ett enormt tålamod och skapade en 
hel hög av fantastiska "rostiga plåtbitar" 


fredag 11 april 2014

Graphic 45 Design Team 2014 Audition-Round two

Steampunk Spells

It was not easy to decide what to make for the final round in the Graphic 45
Design Team audition....I knew I wanted to use my favorite G45 papers, Steampunk
Spells. I had a pretty good idea of what to make...but the biggest challenge was
to make a Youtube video....I have never ever done a Youtube tutorial, but I guess
there has to be a first time for everything!!! You can find the result of my "movie making
efforts" at the end of this post. 


A 14" high exploding pentagon. 
A base of chipboard and a LOT of hot glue....g45 staples and my favorite G45 papers.


The metal butterfly is attached to the lid with black pearl strings.


Chipboard cut with Sizzix/Holtz dies (Gadget gears and Mini Labels) painted with 
black gesso and Decoart Metallic lustre Gold to match the G45 staples.


I used a Martha Stewart deep edge punch (framed tulips) for the "railing" on top.
I love the matching die cut sheets, the sign from Steampunk Spells Banners.


An album inside....


Of course I made a pentagon album.....


The album is folded to fit in my "exploding pentagon"


Base of black cardstock.....


Lots and lots of chipboard and cardstock decorations, from Steampunk Banners,
Tags & Pockets and Chipboard 1 &2.


And if you take the "lid" of..........


......the "box" opens up and reveals my "Steampunk Lady"


The dress form is a cutting file from SVGcuts (from a set called Dress Shop)
cut in cardstock with my Silhouette Cameo.


Butterflies, a brad and a piece from a metal key for the dress.


The skirt looks rather torn and distressed....(made from polyester mesh)


A satin ribbon and brads to hold the skirt together.


A lot of flowers....all made from G45 papers in the Steampunk Spells collection.
Some of the flowers is from the die cut sheet "Steampunk Spells Flowers".

And now for the moving pictures...3-2-1 Action!!


It's no big secret that I love making paper flowers.... my all time favorite is
the "paper peonie" 


And here is the "step by step"


I love how you can transform a "simple piece of paper" into something
completely different....


.......here's another of my favorites.


Thank you for taking the time to look at my work!!!