Visar inlägg med etikett Askar. Visa alla inlägg

söndag 23 november 2014

A gift box for Madelaine...

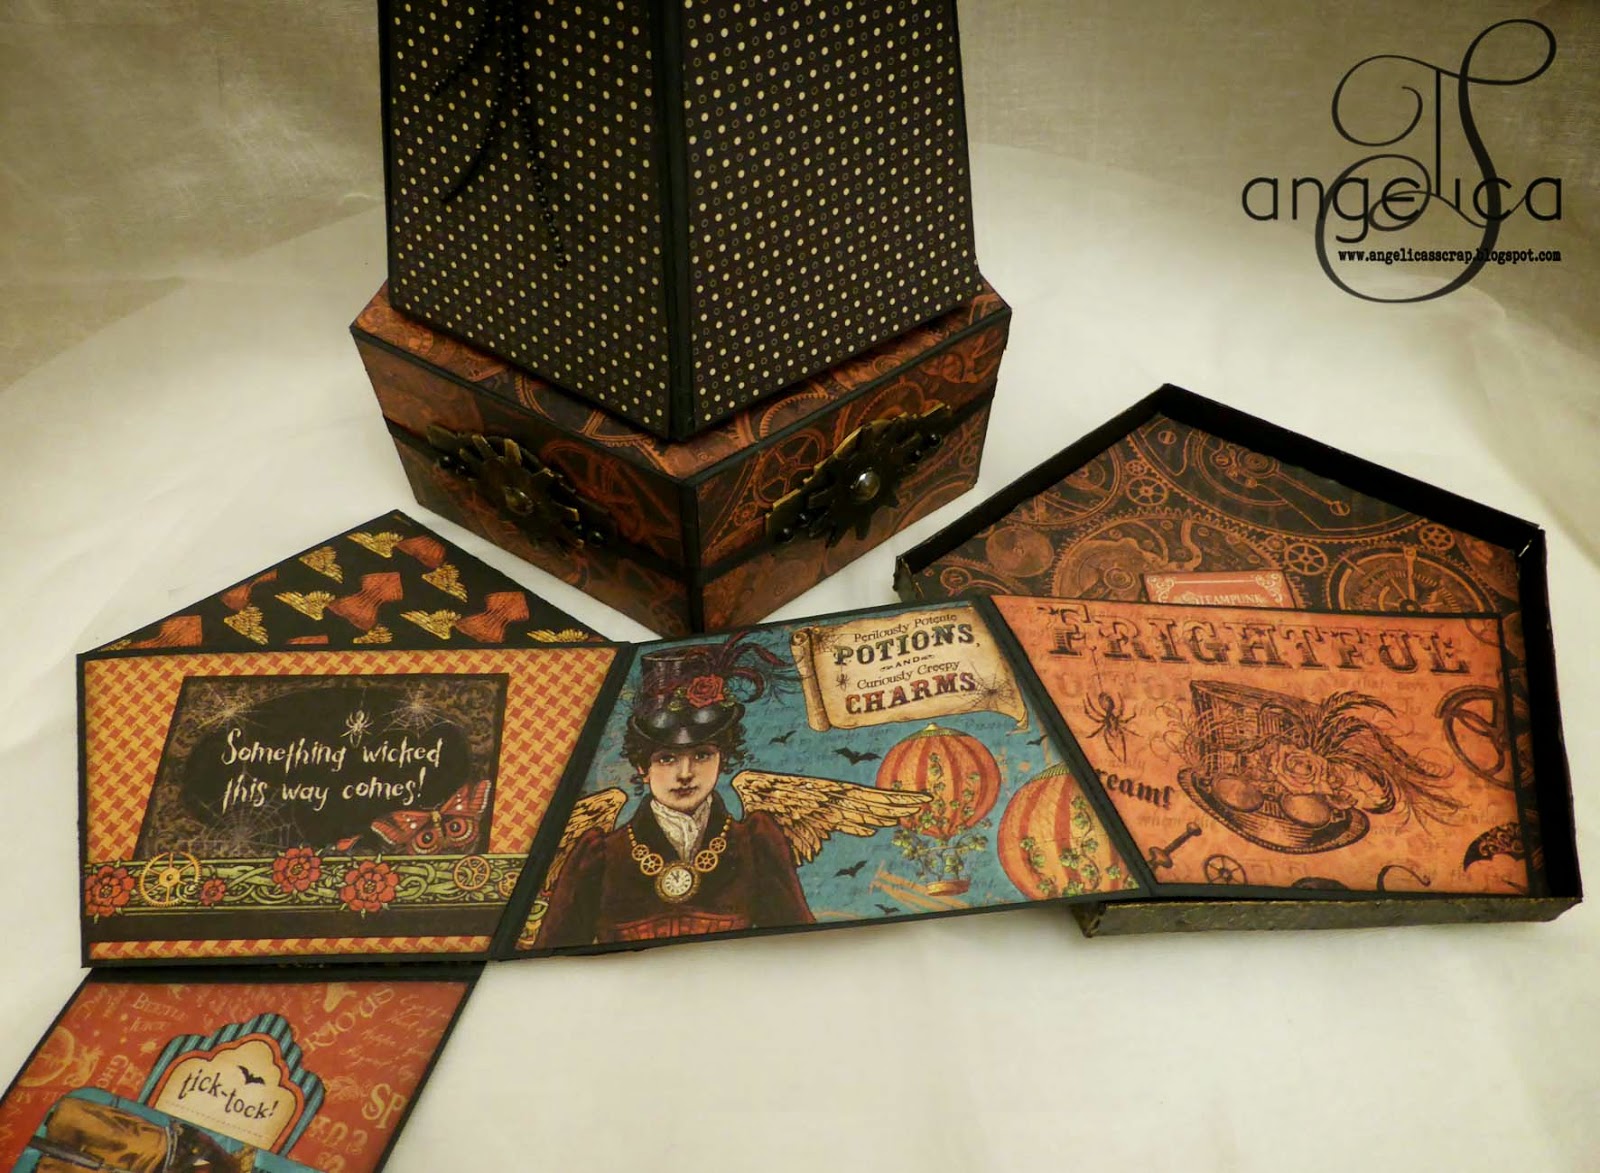
 A gift box for a friend.. 

En liten present till en vän....

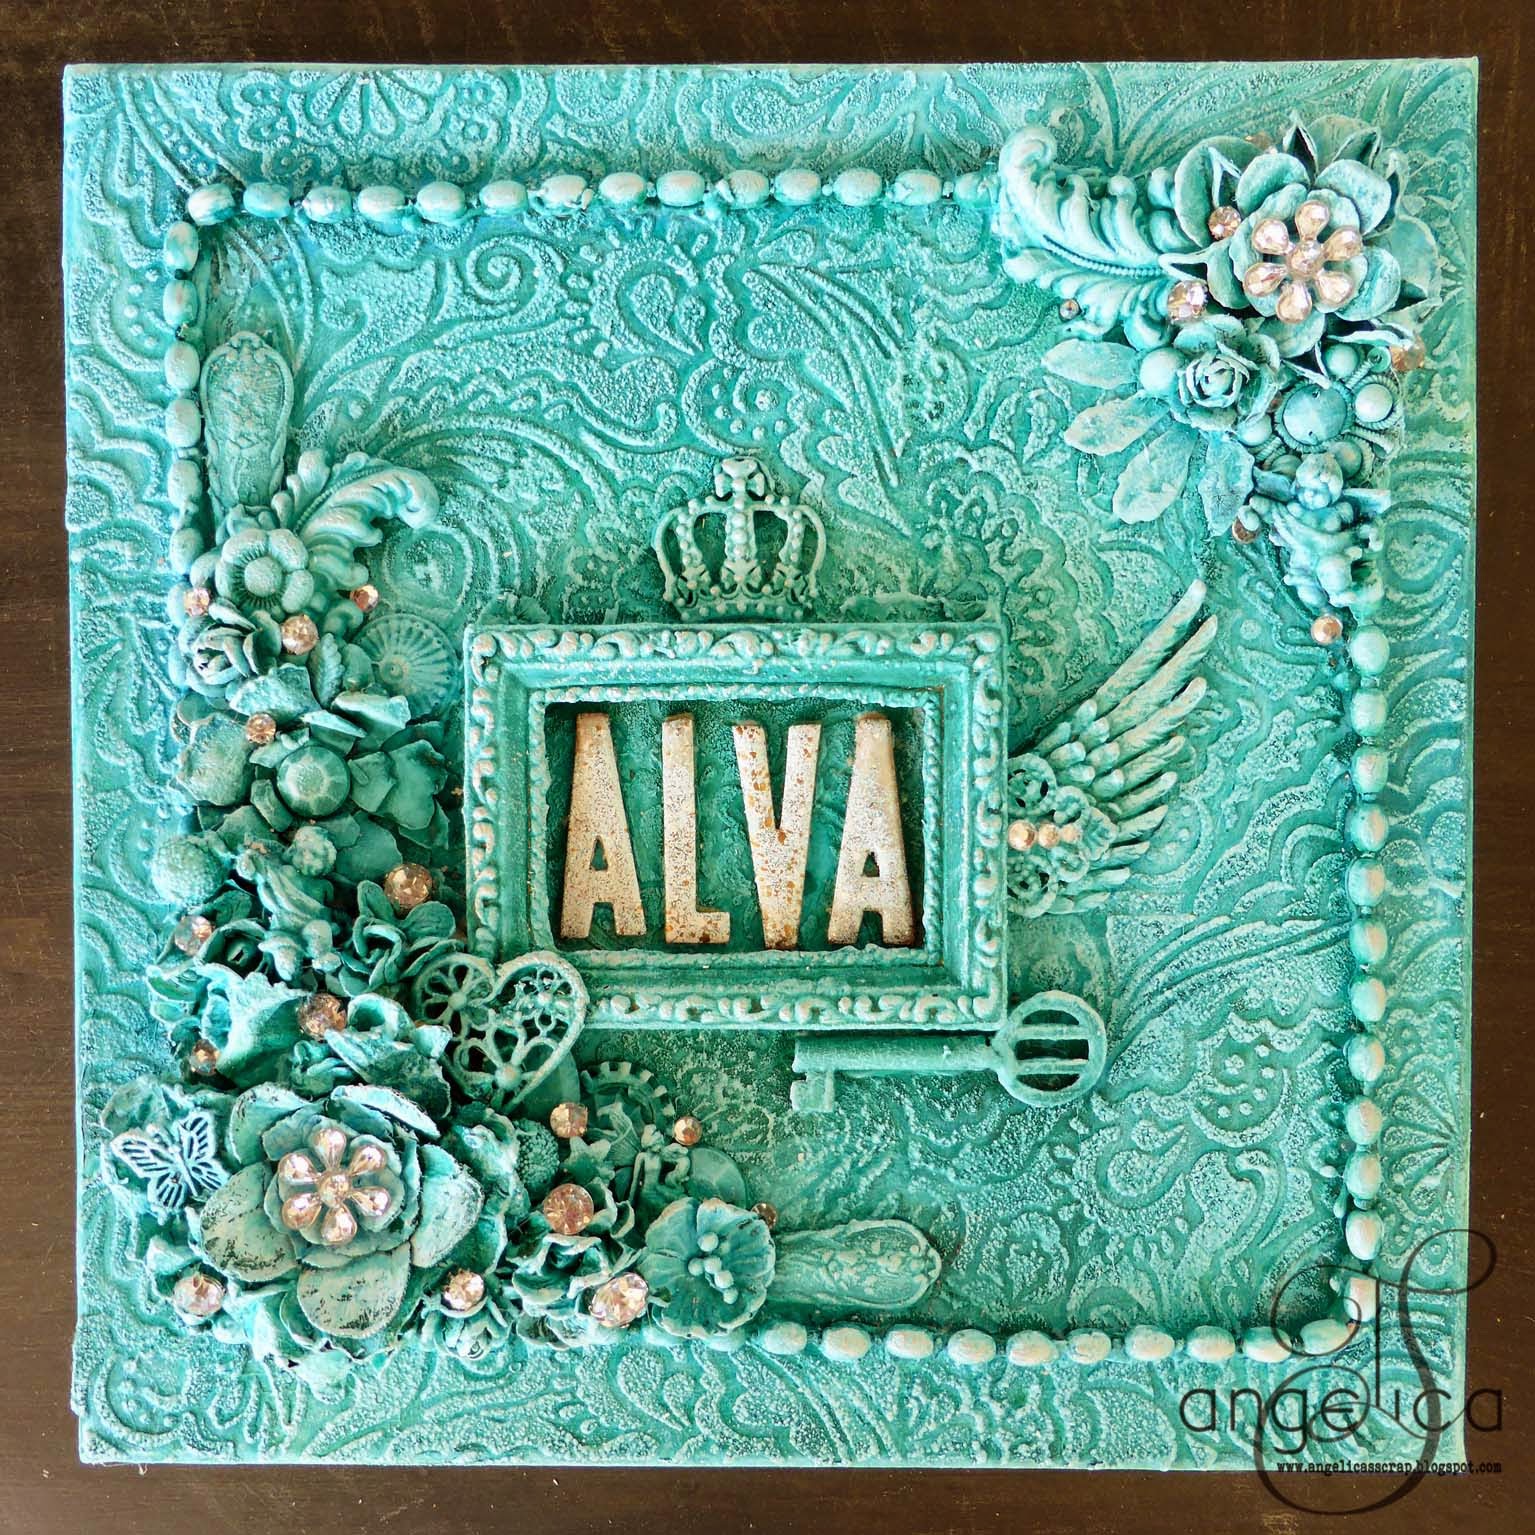
The box is covered in dry embossed cardstock sealed with Matte Medium 
and then painted with acrylic paints from Decoart. 

Lådan är täkt med embossad cardstock, ett lager Matte Medium och sedan
målad med akrylfärger från Decoart.

 First I painted the box brown then I dry brushed the raised areas with a gold 
metallic.  To get the green tarnished look I used Decoart Antiquing cream

Först målade jag lådan mörkbrun och torrborstade sedan med en guld färg.
Massor med grön Decoart Antiquing cream för att få den att se ärgat ut.


One of Spellbinders wonderful 3D embossing folders...

En av mina favorit embossing foldrar från Spellbinders.

The lock from Rox stamps..

Låset från Rox Stamps....

Lace on the edge of the lid.

Lite spets under färgen runt kanten på locket.

Two layers of cardstock. I used an embossing folder from Darice for the 
card underneath and then added a die cut (Die from Spellbinders) on top

Två lager papper, först ett lager cardstock embossat i en folder från Darice och
sedan en die cut skuren med en die från Spellbinders ovanpå.

I had a hard time finding a gift for Madelaine that would fit in the box,
 not a great idea to make the box first and then go shopping for a birthday 
present LOL

När asken var klar insåg jag att jag borde nog hitta en present också....inte 
världens bästa ide att göra asken först och hitta en present i rätt storlek efteråt.

I lined the box with a golden tissue paper.

Asken är fodrad med ett tunt guldpapper

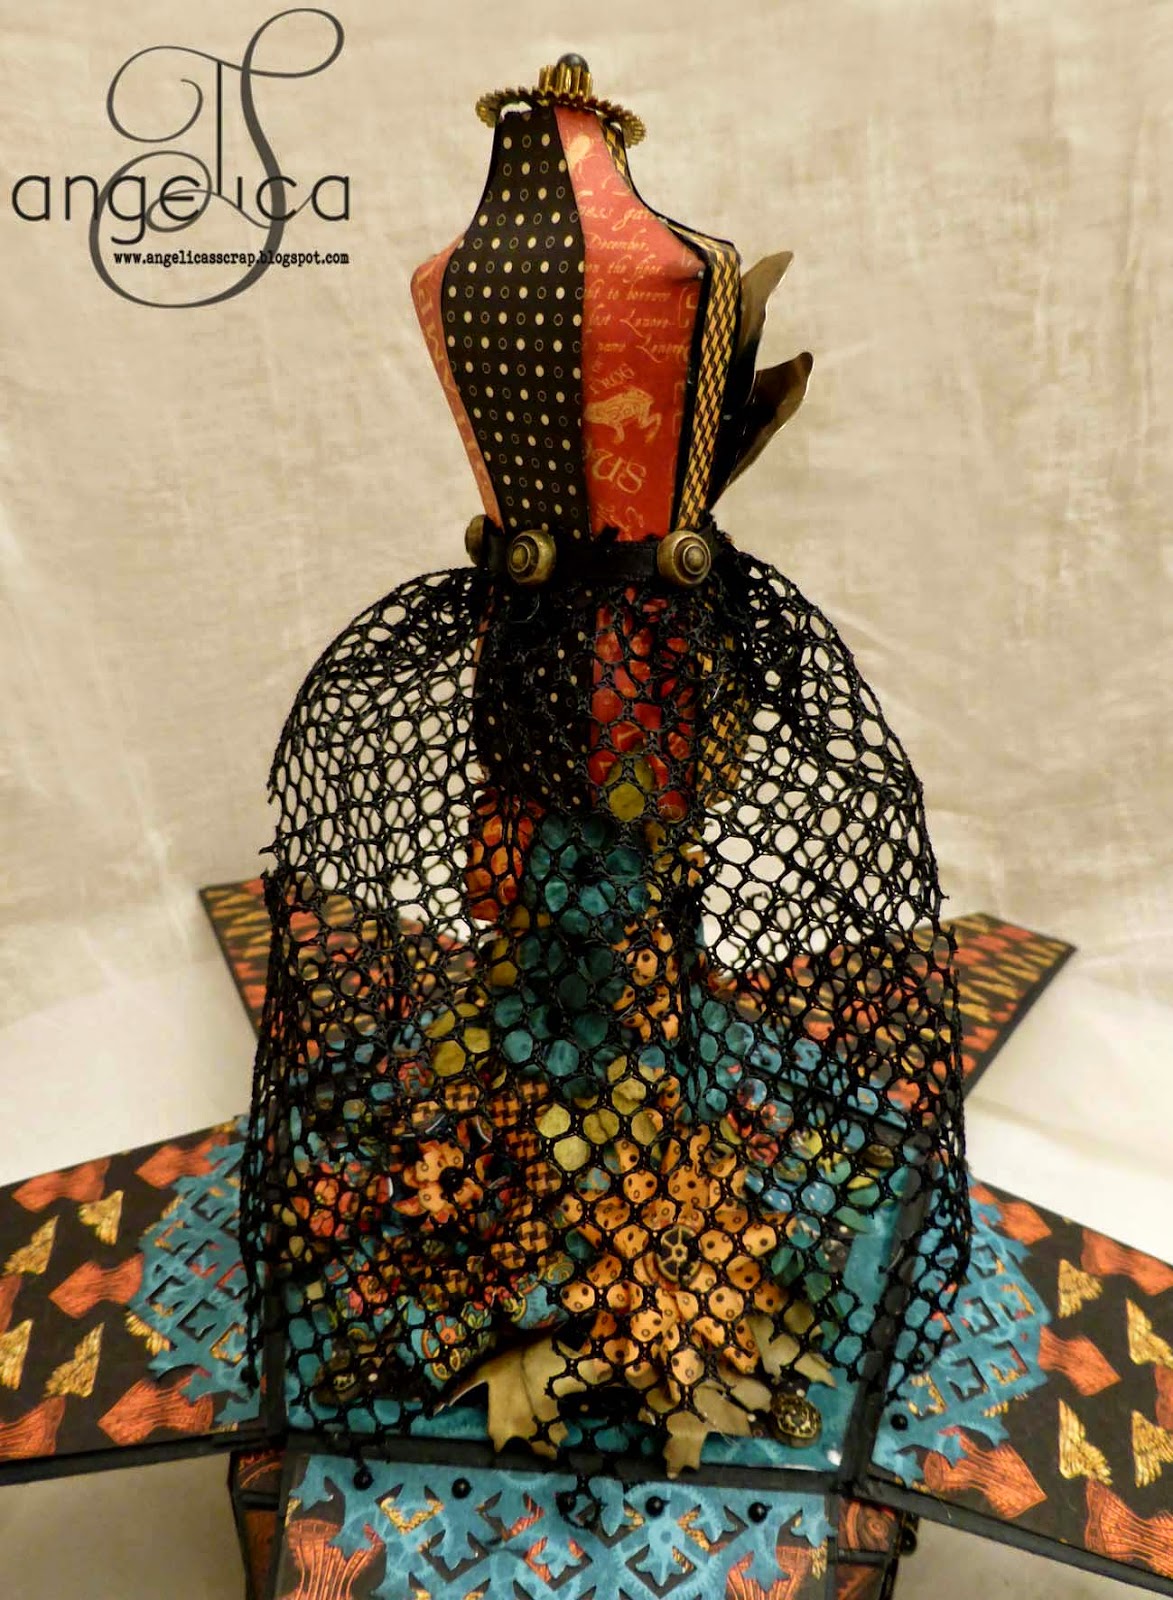
Another die from Spellbinders, I wish that it was my own handwriting...
but NO .. a laser print. Aged and distressed with acrylic paint.

Ännu en Spellbinders die, jag önskar verkligen att jag skrivit texten själv....
men NEJ det är en utskrift från laserskrivaren (fördelen är i alla fall att den
går att läsa) Lite akrylfärg för att få den se gammal och sliten ut.


I started out with a box, a pile of embossed cardstock, lace and some metal feet...
...and as always I changed my mind along the way, I ended up using Hitch 
Fasteners from Tim Holtz for feet instead of the ones I planned to use.

Jag hittade en papplåda i gömmorna, embossade lite cardstock och skar ut
några remsor med en Spellbinders die. Som vanligt ändrade jag mej under 
resans gång och bytte ut dom fötter jag tänkt använda mot Hitch Fastneners
från Tim Holtz. Konstigt att det aldrig blir som man tänkt sig :)


onsdag 20 augusti 2014

Image Transfer

I spent most of this amazing summer outdoors...a few garden projects and a lot of 
building and painting, I haven't managed to create anything in my craft room, 
to hot to even think about spending time indoors without air conditioning. 
But I'm really happy about my new outdoor kitchen and my my freshly 
painted fences. 

I needed a gift box for a bottle of wine for a friend so for the first time in 
months I'm back at my craft table....

Den här sommaren har det inte blivit mycket pysslat....tropisk värme och en hel del 
projekt här hemma. Det har målats staket och byggts utekök och ärligt talat har det 
inte känts direkt lockande att tillbringa den varmaste sommaren i "mannaminne" 
inomhus i pysselrummet. 

Men helt plötsligt dök behovet av en presentförpackning till en vinflaska upp... 
så för första gången på några månader är jag tillbaka vid arbetsbordet.


I used one of Andy Skinners Image Transfer Printables (you can find all of his
new Shabby Hi Res Image transfers HERE) I think this one is just perfect for
a shabby wine box.

Jag använde en av Andy Skinners nya motiv till en bildöverföring (ni hittar alla hans 
högupplösta vintage bilder HÄR) Den här passade perfekt till en presentbox som ska
innehålla en vinflaska.


A chipboard die cut (die from Spellbinders) glued to the tin before i painted it.

En remsa cardstock utskuren med en die från Spellbinders klistrad på burken innan 
jag målade den.


A metal decoration, a knob and a round piece of wood glued to the lid.

En metall dekoration, en knopp från en gardinstång och en träbit limmad på locket.


For this project I used:

Americana Multi Surface Satin Black, Americana Decor Chalky Finish Yesteryear,
Americana Decor Creme wax Golden Brown and the Matte Medium from the new 
Media Line, all from Decoart.


I glued all the pieces in place, and painted the whole thing black, two coats.

Jag började med att limma dit delarna på locket och de utstansade bårderna på
burken. Två lager svart färg.


Then one coat of Chalky Finish Yesteryear. I sanded down the paint to reveal some of 
the black paint. Before I applied a top coat of Brown creme wax I made an 
image transfer. Watch the video below by Andy Skinner if you want to learn how
to transfer images seamlessly using Decoart Media Matte Medium.
Ett lager Chalky Finish Yesteryear, jag slipade fram den svarta grundfärgen på några
ställen. Innan jag avslutade med ett lager Golden Brown creme wax för att få en riktigt 
antik look gjorde jag en bildöverföring med Matte Medium. Kolla in videon här under 
av Andy Skinner om ni vill se tekniken.


fredag 27 juni 2014

Stampendous & Decoart

Stampendous-DecoArt bloghop day five


2014_06_decoart


 The excitement continues as conclude our grand tour of amazing artists playing with Stampendous, DecoArt, and Princeton Artist Brushes via inspired by Willow Wolfe products! The inspiration has been amazing, and today you'll be even more astonished! If you missed the beginning of our journey, be sure to go back and check it out!
MONDAY - TUESDAY - WEDNESDAY - THURSDAY 


For the final day of hopping around the world I decided to play with the new DecoArt 
Antiquing Creams and a lot of Stampendous embossing powders, tinsel and mica flakes. 


I altered a cardboard box using DecoArt Media Fluid Acrylics and Black Antiquing cream.


Embossed cardstock to create the texture....


A lot of embossing powders, mica flakes and tinsel on the petals


Antiquing Cream on the flowers to add to the distressed look.


And of course... I use the box for storing my embossing powders.


I covered the cardboard box with cardstock embossed in an embossing folder.
First I primed the embossed cardstock with Matte Medium and then painted
it with Media Fluid Acrylic Metallic Gold. 


I applied some Stampendous embossing powder Aged Gold to the edge of the lid.


I covered the whole thing with black Antiquing Cream and let it dry. Then I used a
damp cloth to wipe the Antiquing Cream back. The Antiquing creams dries but it
doesn't cure so you have unlimited working time and if you don't like the result...
just wipe it all off and start over and when you get the result you want seal with a
Media Varnish. I sealed it with DecoArt Media Satin Varnish.


The flowers gave me the perfect opportunity to experiment with a lot of embossing 
powders, mica flakes and tinsels....and I did!! A lot of different powders on the petals.
A brad in the middle to hold them together.

For a chance to win some great prizes, Simply hop to each blog and leave a comment! 

Your comments on the blogs are your entry into the drawing! Stampendous will randomly choose three blog posts from all the designer posts this week and then choose a winner from each to receive a prize package. BUT there are few bonus goodies for some lucky people who SHARE our Facebook posts and Pinterest Pins! Stampendous will send three prize packages to commenters with a U.S. Mailing Address, DecoArt will send three Sample Packs to international commenters so they can play, too!! 

Like StampendousDecoArtPrinceton Artist Brushes and inspired by Willow Wolfe on Facebook!  We've also got a Pinterest Board started! 


Ready for your trip around the world???  Let's get Hoppin!


Louise Crosbie (Scotland, UK)

Lea Kimmel (North Carolina, USA)

Claudia Neubacher (Vienna, Austria)

Asia King (Oxford, UK)

Iliane de Fockert (Elly) (Niedersachsen, Germany)

Suzanne Czosek (Illinois, USA)

Julia Stratford-Wright (near London, UK)

Kristine Reynolds (California, USA)

Angelica Stark (Hudiksvall, Sweden)

Mark Gould (West Sussex, UK)

Debbie Cole (California, USA)

Jamie Martin (Oklahoma, USA)

Tobi Crawford (BC, Canada)

Wendy Price (New Jersey, USA)

Jessa Plant (Arizona, USA)


A few of the bloggers this week are new to hopping, so if you have an issue with any of the links, here's a little tip! If you get a page that says "Sorry that Page is not here" or something similar, try clicking on the header of the blog, or look for something that says Home. The hop page should be near the top of the day's posts. We will fix broken links as the day goes on, as well, so check back here if you are really lost.

lördag 21 juni 2014

A gift box for a baby girl...

I needed a gift box for a gift for little baby girl Alva, a perfect opportunity to 
give the new colors from Decoarts New Media Line a try. I made a blue box 
for a baby girl.

Jag behövde en presentask till en present åt lilla Alva, ett perfekt tillfälle att
testa de nya färgerna ur Decoarts nya Media Line. Det blev visst en blå ask
till en liten tjej.


A gift box 25x25 cm. The lid covered with Decoarts Textured Sand Paste through
a stencil from Memory Box.

En presentbox, 25x25 cm. Locket täckt med Texture Sand Paste från Decoart.
Stencil från Memory Box.


 A white satin ribbon on the edge of the lid.

En smalt sidenband runt kanten av locket.


I do love the texture the Sand Paste from the new Media Line from 
Decoarts gives.

Jag gillar verkligen effekten man får med Texture Sand Paste från Decoarts
nya Media Line. 


I glued a lot of flowers, beads and metal decorations to the lid, primed the whole thing
with Gesso and then sprayed it with a mix of the new Fluid Acrylics (Cobalt Teal) from 
Decoart and water. Dry brushed it all with with Titanium White.

Limmade en hel massa blommor, pärlband och metalldekorationer med limpistol på
locket av asken. Grundade allt med vit Gesso. Blandade Fluid Acrylics (Cobalt Teal) och 
vatten i en sprayflaska och gav allt en rejäl dusch. Torrborstade allt med Titanium
White.


Letters cut in chipboard with a die from Sizzix/Holtz covered with embossing
powder from Stampendous.

Bokstäverna utskurna ur chipboard med en die från Sizzix/Holtz täckta med 
embossingpulver från Stampendous.


Some rhinestones to finish it off...


fredag 11 april 2014

Graphic 45 Design Team 2014 Audition-Round two

Steampunk Spells

It was not easy to decide what to make for the final round in the Graphic 45
Design Team audition....I knew I wanted to use my favorite G45 papers, Steampunk
Spells. I had a pretty good idea of what to make...but the biggest challenge was
to make a Youtube video....I have never ever done a Youtube tutorial, but I guess
there has to be a first time for everything!!! You can find the result of my "movie making
efforts" at the end of this post. 


A 14" high exploding pentagon. 
A base of chipboard and a LOT of hot glue....g45 staples and my favorite G45 papers.


The metal butterfly is attached to the lid with black pearl strings.


Chipboard cut with Sizzix/Holtz dies (Gadget gears and Mini Labels) painted with 
black gesso and Decoart Metallic lustre Gold to match the G45 staples.


I used a Martha Stewart deep edge punch (framed tulips) for the "railing" on top.
I love the matching die cut sheets, the sign from Steampunk Spells Banners.


An album inside....


Of course I made a pentagon album.....


The album is folded to fit in my "exploding pentagon"


Base of black cardstock.....


Lots and lots of chipboard and cardstock decorations, from Steampunk Banners,
Tags & Pockets and Chipboard 1 &2.


And if you take the "lid" of..........


......the "box" opens up and reveals my "Steampunk Lady"


The dress form is a cutting file from SVGcuts (from a set called Dress Shop)
cut in cardstock with my Silhouette Cameo.


Butterflies, a brad and a piece from a metal key for the dress.


The skirt looks rather torn and distressed....(made from polyester mesh)


A satin ribbon and brads to hold the skirt together.


A lot of flowers....all made from G45 papers in the Steampunk Spells collection.
Some of the flowers is from the die cut sheet "Steampunk Spells Flowers".

And now for the moving pictures...3-2-1 Action!!


It's no big secret that I love making paper flowers.... my all time favorite is
the "paper peonie" 


And here is the "step by step"


I love how you can transform a "simple piece of paper" into something
completely different....


.......here's another of my favorites.


Thank you for taking the time to look at my work!!!