Visar inlägg med etikett Jul. Visa alla inlägg

måndag 17 november 2014

All I want for christmas...

All I want for christmas (besides world peace, a happy healthy family and all the other
obvious things) is a big box of paints, paint brushes, mediums and stencils, thats what
would make me feel like a "child on christmas day" again. Don't get me wrong, I LOVE
christmas, but these days I most of all love the preparations. Decorating and finding the
perfect gift for someone, baking the cookies my grandmother and my mother used to
make. I can't imagine a christmas without a gingerbread house. Christmas to me is
all about family traditions. Christmas stockings is one of those things that isn't really a
swedish tradition, but in my family it is. 
This is what i want for christmas in my stocking!!

Förutom dom självklara sakerna som världsfred, en frisk lycklig familj osv. så önskar
jag mej en stor låda med akrylfärger, medier, penslar och stenciler. En sådan julklapp
är vad som skulle få mej att känna mej som ett "barn på julafton" (eller möjligtvis som
ett barn i en godisfabrik) Numera är det inte julklapparna som hägrar, missförstå
mej inte jag ÄLSKAR julen, men det är förberedelserna som jag älskar mest. Hitta den 
perfekta julklappen åt någon, baka samma kakor som farmor och mamma bakade. Jag
kan inte tänka mej en jul utan ett pepparkakshus. Julen för mej består av traditioner,
närmare bestämt familjetraditioner. Julstrumpor är väl inte direkt en svensk jultradition,
men i min familj har det i alla fall blivit det.


Most christmas stockings are made of fabric......a blank canvas is really nothing
more than a piece of fabric.....why not paint a christmas stocking??
A christmas stocking made of fabric,  painted and texturized with  Fluid Acrylics
 and mediums from the Media Line from Decoart. 

De flesta julstrumpor är gjorda i tyg....en canvas att måla på är egentligen bara en 
tygbit...varför inte måla en julstrumpa??
En julstrumpa av tyg, målad med akrylfärger från Decoarts Media Line.

 A metal decoration and chain...

En metalldekoration och en kedja att hänga upp strumpan i.

A rhinestone colored with acrylics,  Quinacridone Gold and Burnt Umber.

Stenarna är färgade med akrylfärg, Quinacridone Gold och Burnt Umber

Just like an acrylic painting on an ordinary canvas but in an unusual format LOL

Som en akrylmålning på duk, fast i ett annat format....

Step by step....

I love to recycle old stuff, to give discarded things a new life, I cut the parts for 
my stocking from an old cotton table cloth (I especially love to use things that has 
a personal meaning, in this case the table cloth used to belong to my grandmother)
I primed the pieces with Gesso and then used Modeling paste through a couple of
stencils.

Jag älskar när kasserade prylar kan få ett nytt liv. Jag klippte till delarna till min jul-
strumpa av en gammal bordsduk av bomullstyg (Jag gillar verkligen när jag har en 
personlig anknytning till det jag återanvänder, i det här fallet har duken tillhört min
 farmor) Jag grundade tygbitarna med Gesso, och sedan lite textur med Modeling 
Paste genom några olika stenciler.

A base coat of Media Fluid Acrylics Cobalt Teal Hue and then a color wash
with Quinacridone Gold.

Ett första lager färg, Media Fluid Acrylics Cobalt Teal Hue och sedan ett tunt
lager av utspädd Quinacridone Gold.

I stitched the pieces together when the fabric wasn't totally dry so it would be
easier to turn the stocking the right side out, and the gave it a second wash of
Quinacridone Gold.

Jag sydde ihop delarna till strumpan innan färgen var helt torr så att det blev
lättare att vända rätsidan utåt. Sedan ett lager Quinacridone Gold till.

Finally I dry brushed the raised pattern with Burnt Umber and Metallic Gold.
You can find more information on the products used at Decoart


Till sist torrborstade jag dom upphöjda delarna först med Burnt Umber och
sedan med Metallic Gold.


tisdag 24 december 2013

Merry Christmas!!!

I'll start by wishing you all a very Merry Christmas!!
Thank you all for the past year, a big thanks to all of you who look in here
 now and then and an extra big thank you to those of you who leave small traces 
in the form of comments, it's great fun to follow your tracks and find my way to 
your blogs and see all the wonderful things you create ...... so much creativity 
and inspiration! 

 .....and since there is not much hope for a white
 christmas where I live I made a tag in white to compensate.... but I'm 
still dreaming of a white christmas!!


Jag vill börja med att önska er alla en riktigt God JUL!!!!
och tacka er alla för året som gått, ett stort tack till er alla som tittar in här
hos mej då och då och ett extra stort tack till er som lämnar små spår i form 
av kommentarer, det är fantastisk roligt att följa spåren och hitta till era 
olika bloggar och se vad ni skapar......så mycket skaparglädje och inspiration!

Eftersom det inte ser ut att bli en vit jul här hemma hos 
mej fick det bli en vit tag så det åtminstone blir lite "vit jul" 


A tag made of white cardstock embossed in an 3D M-Bossabiliteis embossing 
folder from Spellbinders called Ornamental Swirls. A coat of white gesso and 
then a little Metallc Lustre Silver on the raised areas.

En tag av vit cardstock embossad i en 3D M-Bossabiliteis embossing folder 
från Spellbinders som heter Ornamental Swirls. Tagen först grundmålad med vit 
Gesso och sedan lite Metallc Lustre Silver på dom upphöjda partierna.


The vintage picture of Santa and the cute children from Nicecrane Designs.
I used a border punch from Martha Stewart and made a "paper rosette".
Pieces of torn up lace trim under the metal frame

Bilden av tomten och barnen från Nicecrane Designs. En "paper rosette" bakom
motivet med en kant från en kant stans från Martha Stewart, några bitar av ett spets
band tittar fram bakom metallramen.


Metal decorations from Korthobby , they all started out as silver decorations
but with a little white Gesso they now got a shabby chic look. A few 
small rhinestones on the metal parts.

Metall dekorationer från Korthobby. Alla metall dekorationerna var från början
silverfärgade men med hjälp av lite vit Gesso fick dom en ny Shabby Chic look.
Några rhinestones här och där på metalldelarna.


Some prisms and a brad with a big pearl from Reprint Hobby.

Några prismor och en brad med pärla från Reprint Hobby.


tisdag 17 december 2013

Heavy metal Christmas?

An easy way to give a "metallic look" to almost anything is to cover it in
metal!! Aluminium tape and black acrylic paint is a fun way to 
make a very personal gift or a christmas decoration.

Ett enkelt sätt att få något att se ut som metall är så klart att klä in det med metall!
Alu tape och svart akrylfärg är ett kul (och snabbt) sätt att skapa en väldigt personlig
julklapp eller en cool juldekoration.


A few of the gifts under my chistmas tree this year will contain "metal Santas" and 
sleeping angels. 

Några paket under min julgran i år kommer att innehålla metall tomtar och sovande 
änglar


Gift wrapping the "heavy metal" way ?! I hope the recipants does't unwrapp
their presents...

Presentinslagning på hög nivå :) 


He looks kind of happy with his new look?!

Jag tycker att han ser ganska nöjd ut med sin nya stil?!


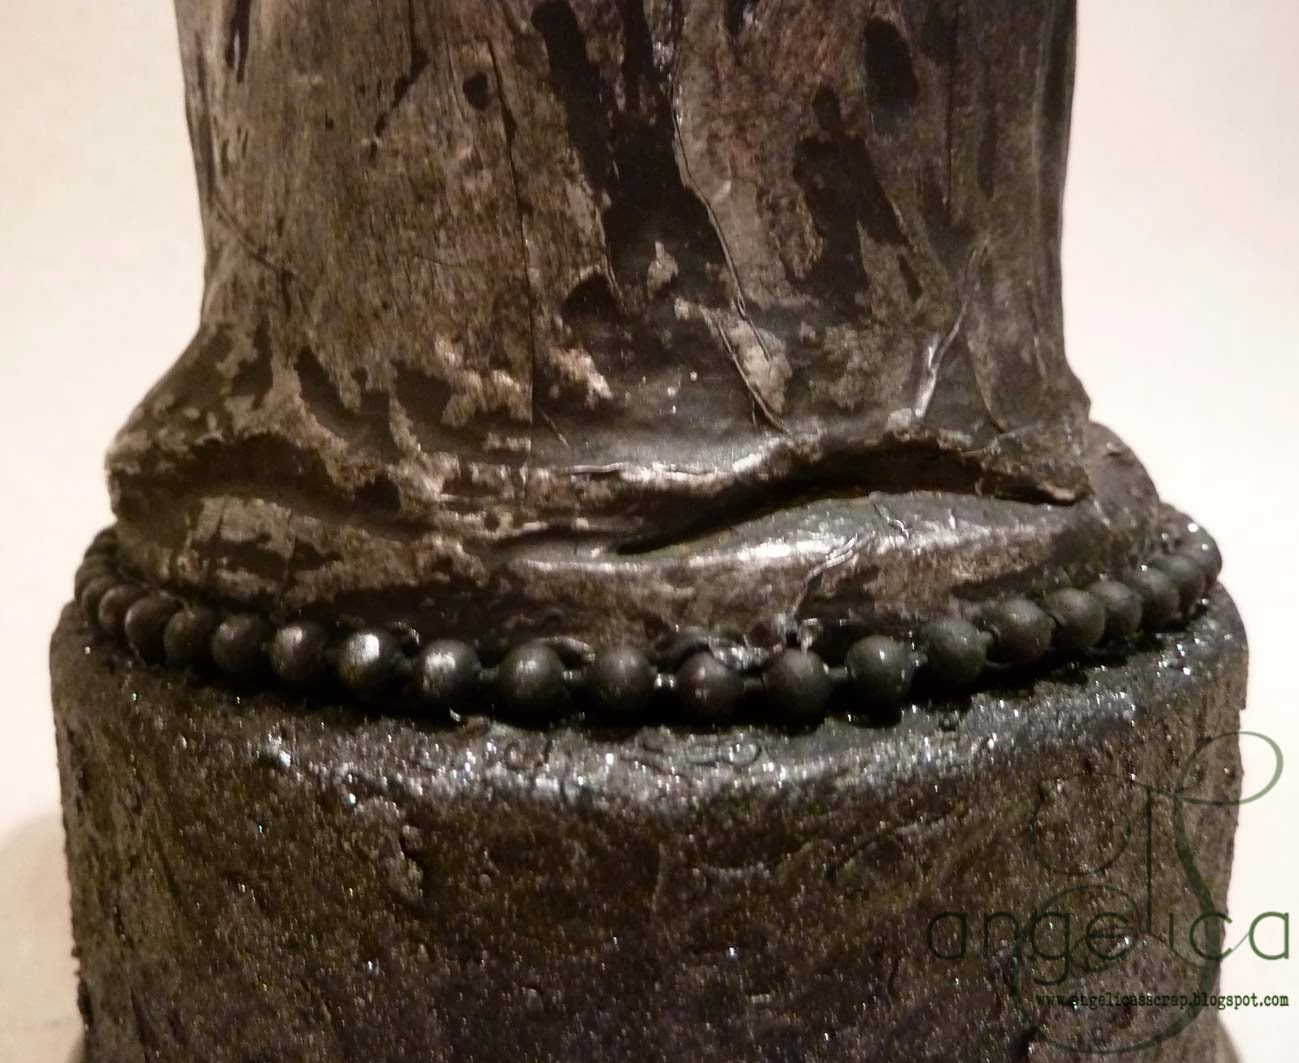
A base made of a metal tin covered in Decoart Texture Fierro Iron Black.

Tomten fick lite extra höjd av en plåtburk täckt med Decoart Texture Fierro 
Iron Black


The C (for Christmas) is a vintage typewriter key.

Bokstaven C är en tangent från en gammal skrivmaskin, några prismor
fick plats under.


A metal ball chain.

En kulkedja av metall.


A close up of my sleeping angel

En närbild av min sovande ängel.


I like how you can see all the details throug the metal tape...

Jag gillar att man ser detaljerna genom tapen...


And...here's the "how to"...


You can use almost anything for this technique, I used a plaster figurine....
aluminium tape and Decoart Traditions Carbon black.

Man kan tejpa in nästan vad som helst. Jag har använt en ängel av gips, aluminium tape och Decoart Traditions Carbon Black.


I covered the angel in alu tape....piece by piece..

Jag tejpade över hela ängeln med alu tape....bit för bit...


...I rubbed with a stompf to make sure all the details is showing through the tape.

....gnuggade fast tapen ordentligt, jag använder en stompf.


All taped up!!

och när hela ängeln är "intejpad"....


One coat of acrylic paint, let the paint dry for a couple of minutes...

......ett lager akrylfärg. Låt färgen torka några minuter så den hinner "sätta sig"
en aning.....


Use a babywipe or a soft cloth to wipe most of the paint off.

Torka bort det mesta av färgen med en babywipe eller en mjuk trasa.


I like to leave quite a lot of paint on to make it look really dirty and distressed,
but that's just me....

Jag gillar att spara ganska mycket färg för att få ett riktigt "smutsigt" resultat,
men det är så klart en smaksak.


And finally a pic of my "metallic Santa" before he got "taped"
(My deepest appologies to the family member that painted this santa many
years ago, I do love DIY christmas gifts!!! but he just happend to be in the
 wrong place at the worst of times and got taped)

Och till sist en bild av tomten innan den råkade ut för tape massakern.


lördag 14 december 2013

Faux Copper...

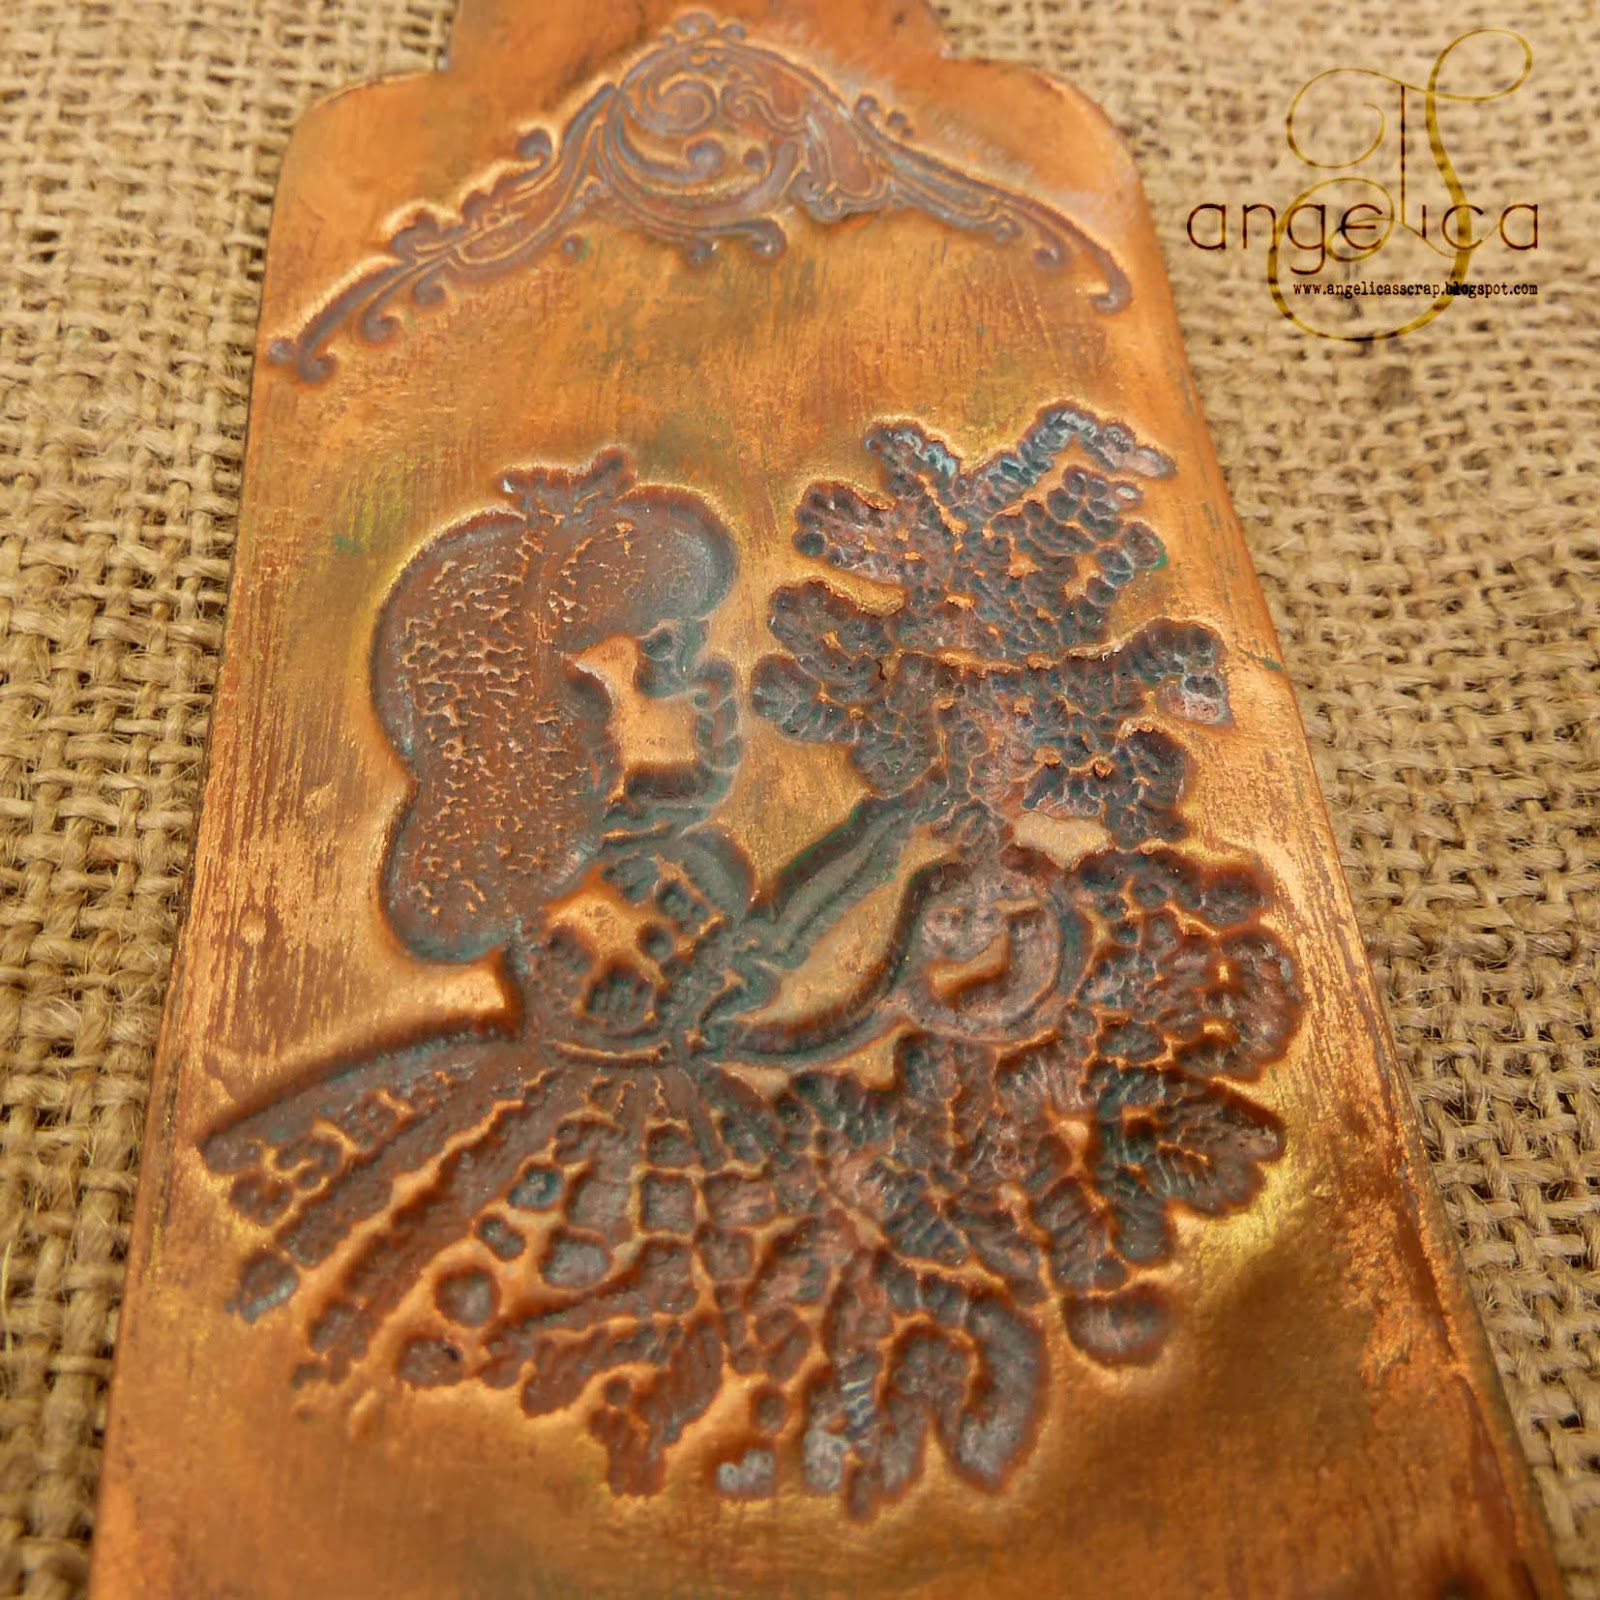
I'm still playing with clay, stamps and paints, this time I made a tag....

Jag är tydligen inte riktigt klar med julbaket....leker vidare med mina julkakor,
nu blev det en tag av lera...


I rolled out a piece of polymer clay and cut out my tag shape. (Just like baking
gingerbread cookies) Then I grabbed some stamps and stamped my "cookie".
I made sure I got a nice deep impression. Then i baked my tag in the oven
according to the instructions from the manufacturer.
You can find my "christmas cookie" tutorial HERE.

Jag kavlade ut en bit lera (polymer lera som härdas i vanlig ugn) och skar ut formen 
av min tag. (Precis som att baka pepparkakor.) Sedan fram med stämplarna och börja 
stämpla, jag såg till att avtrycket blev djupt och tydligt. In med tagen i ugnen och när 
den svalnat är det bara börja "dekorera"
Receptet på mina "julkakor" finns HÄR


I wanted to create a faux copper look so I applied a lot of  wax metallic finish 
from Decoart, Metallic Lustre, mostly copper but a little bit of gold to.

Jag ville skapa en tag som efterliknar gammal kopparplåt...så jag gnuggade in
hela tagen med Metallic Lustre från Decoarts, mest kopparfärgad men
även lite guld för att få lite liv i "metallen".


To make the "copper" look old and tarnished i applyed a few very thin
color washes of blue, green and white acrylic paint.

För att tagen skulle se gammal och ärgad ut målade jag några väldig tunna lager
av akrylfärg i grönt, blått och vitt.


The beautiful stamps are from Reprint Hobby, both the girl decorating the
christmas tree and the corners is from the same clear stamp set called Bjällerklang.

De vackra stämplarna kommer från Reprint Hobby, både flickan som klär granen
och hörn stämpeln ingår i samma clerastamp set som heter Bjällerklang.


A ball chain finished the tag. A small piece of Kraft cardstock with a
christmas greeting attached to the chain.

En liten bit Kraft cardstock med en stämplad julhälsning sitter på kedjan
man kan hänga upp tagen i. 


söndag 8 december 2013

Christmas cookies......

Christmas is fast approaching .... I relly like personalized gifts and what could be
 more personal than a  hand made decoration or a custom-made gift box?

Julen närmar sig med stormsteg....jag gillar personliga presenter och inget är
väl mer personligt än en egentillverkade dekorationer och  presentaskar?


I love my acrylic paints and my stamps and I was trying to find a way to use them 
together. (Of course you can stamp with acrylics but I was looking for something 
else) I added some polymer clay to the ekvation and came up with a plan LOL
This is the result, gift boxes and decorations.....

Jag älskar mina akrylfärger och mina stämplar. Jag letade efter ett sätt att använda
dom tillsammans (så klart att man kan stämpla med akrylfärg men nu ville jag hitta på
något helt annat) Jag tillsatte lera till ekvationen och hade helt plötsligt en plan.
Här är resultatet, presentaskar och dekorationer till jul.....och dessutom mitt bidrag till 
Crafty Individuals utmaning "make it festive"


Decorations that are not so "Christmassy" can hang around long after the holiday 
season. Hearts in gray and white will work in all seasons.

Dekorationer som inte är så "juliga" kan hänga kvar långt efter julhelgen.
Hjärtan i grått och vitt funkar året om.


This one is stamped with a clearstamp from a set from Tattered Angels.

Stämpel från Tattered Angels ur ett clearstamp set.


On this one I used a Background stamp from Tim Holtz. Seam binding ribbon and 
pearls for decoration.

Här en bakgrundsstämpel från Tim Holtz. Seam binding ribbon och pärlor som 
dekoration


All the boxes are made of cardstock, all painted with Decoart Traditions.

Askar av cardstock målade med Decoart Traditions akrylfärger.


Transparent Red Oxide on a white surface gives a warm beautiful color.
Metallic Lustre Gold Rush and Copper Kettle to give it some extra shimmer.
Metall decoration from Tim Holtz.

Transparent Red Oxide på vitt underlag ger en härlig varm färg.
Metallic Lustre Gold Rush och Copper Kettle för extra glans.
Metall dekoration från Tim Holtz.


Here I've used Prussian Blue Hue and Titanium White...
The snowflake is a stamp from Reprint Hobby.

Här har Prussian Blue Hue och Titanium White kommit till nytta...
Det vita sigillet stämplat med stämpel från Reprint.


Burnt Umber and Burnt Sienna offers an old-fashioned look. A fringe from
a discarded lampshade. Stamp from Tim Holtz.

Burnt Umber och Burnt Sienna ger en gammaldags look. En frans från
en skrotad lampskärm. Stämpeln från Tim Holtz.


The blue box has been covered with cardstock embossed in a folder from Darice
painted with Prussian Blue Hue and dry brushed with Titanium White.
Stamp from Crafty Individuals.

Den blå asken har klätts med cardstock embossat i en folder från Darice
målats med Prussian Blue Hue och torrborstats med Titanium White.
Stämpel från Crafty Individuals.


Always difficult to photograph shiny shimmering things ... stamp from Crafty
Individuals, painted with Carbon Black and dry brushed with some Metallic Lustre
diluted with a tiny drop of water.

Alltid svårt att fotografera blanka skimrande saker...stämpel från Crafty 
Individuals, målat med Carbon Black och torrborstat med Metallic Lustre som
lösts upp med en liten gnutta vatten.


Black acrylic paint on the base and Decoart Texture Fierro Gold on the lid.
Lots with Metallic Lustre Gold Rush for extra shimmer. A black organza
ribbon and a lot of stars on top of the lid.

Svart akrylfärg på underdelen och Decoart Texture Fierro Gold på locket.
Massor med Metallic Lustre Gold Rush för lite extra glimmer. Ett svart organza
band med ett stjärnband ovanpå på locket.


If you're still awake after all that...here's the "how to"!

Om ni fortfarande är vakna efter alla bilder....här kommer
en beskrivning.


For my "christmas cakes" I've used clay, as I am not gifted with a lot of
 patience, I  used a polymer clay that hardens in the oven. I hate drying time but 
of course you can use any clay that dries to a hard smooth surface.
I used stamps, Acrylic Paints from Decoarts Traditions line, Metallic Lustre and 
a lot of Triple Thick. 

Till mitt " kakbak" har jag använt lera (eftersom jag inte är begåvad med något
större tålamod har jag använt en lera som härdas i ugn så att jag slipper torktid)
Några stämplar, Akrylfärger från Decoart, Metallic Lustre och en hel massa Triple Thick.


Roll out the clay ....

Kavla ut leran....


Stamp...

Stämpla...


This technique works best with stamps that are not too detailed 

Det funkar bäst med stämplar som inte är allt för detaljerade om man 
vill kunna se motivet tydligt.


Cut the stamped clay to the shape you want...

Skär ut motivet i önskad form..


Cookie cutters works great...

Kakmått funkar ju till annat än pepparkakor...


Bake your "cakes" in your household owen (if you are using an air drying clay, 
then you just have to wait)

In med lerkakorna i ugnen.....(eller om du använder en lufttorkande lera, vänta på att 
dom torkat)


Now the fun begins...

När leran har torkat/ugnshärdat börjar det roliga!


Bring out your paints and have fun!!
One heart, primed whith white and the other with gray, then I dry brushed the white 
heart with gray and gray with white to really bring out the stamped pattern.

Det ena hjärtat grundmålat i vitt och det andra i grått, sedan torrborstade jag
det vita hjärtat med grått och det grå med vitt för att verkligen framhäva det
stämplade mönstret.


A lot of colorwashes to make the stamped images pop out.
Prussian Blue Hue for the snowflakes.

Colorwashes (akrylfärg utspädd med vatten) är perfekt för att framhäva struktur..
Traditions Prussian Blue Hue är min absoluta favorit variant av blått just nu.


A lot of christmas cookies....LOL

Det blev en hel hög av "julkakor"


All "cookies" are first painted with a diluted acrylic paint and then
dry brushed with a lighter color to really make the stamped image appear.

Alla "kakorna" har först målats med en utspädd akrylfärg och sedan 
torrborstats med en ljusare färg för att verkligen få motivet att synas.


The two blue "cookies" are both painted with DecoArt Tradition Prussian 
Blue Hue but the one with the angels has been given a few more coats than 
the one on top.

De båda blå "kakorna" är målade med Decoart Tradition Prussian Blue Hue
men med den undre har målats med betydligt fler lager.


This one has a base coat of Carbon Black and then a top coat of  Metallic Lustre 
Gold Rush.

Här är ett av motiven som först målats svart och sedan fått ett lager av 
Metallic Lustre  Gold Rush på de upphöjda partierna.


To get a beautiful finish that almost looks like glazed ceramics I covered
the whole thing with a layer of Triple Thick, an amazing glaze that gives
a thick, clear high-gloss finish with only one application.

För att få en läcker yta som nästan ser ut som glaserad keramik täckte jag
hela härligheten med ett tjockt lager Triple Thick, en fantastisk glaze som ger
en tjock, glansig yta efter bara en applicering. 


Then reality hit me! 
What to do  with all the stamped and painted clay pieces?? 
Hmmmm....The pieces are perfect as lids on gift boxes!
There were a lot of boxes that needed to be made ​​..... boxes of cardstock 
covered with waste pieces of lace gives a great texture to paint!

Sedan slog verkligheten ner som en bomb!!! Vad sjutton ska jag göra med alla
stämplade och målade lerbitar ??? Bitarna blev perfekta lock till presentaskar!
Det blev en hel del askar som behövde tillverkas.....askar av cardstock täckta med
spillbitar av spets ger en spännande struktur att måla! 


It works great to glue lace or fabric with Deco Arts Textured Glass, glued
and sealed in one step, (I do like quick fixes. LOL)
I covered everything with a layer of gesso, not at all necessary, but it gives a great
matt foundation to paint on ..... then it's just to paint in your favorite colors!
Have fun!!!


Det funkar perfekt att limma spets eller tyg med Decoarts Textured Glass, limmat
och förseglat i ett steg, jag gillar snabba lösningar.
Jag täckte allt med ett lager Gesso, inte alls nödvändigt men det ger onekligen en bra 
matt grund att måla på .....sedan är det bara att måla i dina favoritfärger!!!